Sunday, August 25, 2013

Pumpkin Ales

Origins:
Zymurgy had an article on pumpkin ales this issue and it reminded me that "tis the season" and now was the time to start brewing if I wanted my beer to be ready for the holidays.  No clever name this time sorry.

Recipe Specifications:
  • Batch Size: 10.00 gal
  • Boil Size: 13  gal
  • Predicted OG: 1.070 SG
  • Boil Time: 90 Minutes
Ingredients:
  • 19.0 lb Pale Malt (6 Row) US
  • 1.00 lb Pilsner Malt
  • 1.00 lb Victory Malt
  • 1.00 lb Crystal-60 Malt 
  • 1.25 lb Melanoidin Malt
Total Grain Weight: 23.25 lb
  • 2.00 oz Cascade, US 9.5% Whole Leaf Hops 
  • 6.00 lb Canned Pumpkin
  • 2.0 lb Maple Syrup
  • 2.0 lb Wildflower Honey
  • 1.0 tsp. Pumpkin Pie Spice
  • WLP565 Saison Ale
  • WLP008 East Coast Ale
Starter Procedure:
Thursday August 22, 2013 I went to Brew Brothers and bought my ingredients.  I was splitting this batch of beer so I needed to do two starters.  In order to do this I bought another 2000ml Erlenmeyer flask. I only have one stir plate so I did put the saison yeast on the stir-plate and the east coast ale I just left stationary since it is a more active yeast than the saison.  This way the saison will be a little more active when its time to pitch.

Brew Procedure:
      On Saturday August 25th, 2013 I got up early to brew. First I calculated how much mash water I needed. total grain weight was 19.4 lbs. So to calculate mash water I used the following calculation:

23.25 lbs grain x 1.75 qt/lb = 40.6875 qt. x 1/4 gallon/qt = 10.17 gal
Mash out

6 lbs of pure pumpkin
I used 1.75 since because the mash was going to be extremely thick with all of that pumpkin in it and I didn't want it getting stuck.
The recipe called for the pumpkin to be dissolved in about a gallon of water heated and then poured in the mash-tun.  It called for 6 lbs
which is really inconvenient since the cans of pumpkin came in 15 oz. cans, so I had to buy 7 and only use about 6.5 cans.  I
placed my old extract brew kettle on a burner and heated it up while I dumped the cans of pumpkin in.  After the pumpkin was all dissolved, I filled the mashtun with 10 gallons of water and began heating it to 169 °F.  After the water reached 169 °F I added the grain and began vigorously stirring. After the mash was thoroughly stirred I added the pumpkin on top and let the mash temperature stabilize. After a few minutes the temperature had dropped down to a 185°F and then stabilized at 154°F .  I placed the insulation jacket around the mashtun and let it sit for a full hour.
Pumpkin Mash
     After mashing I transferred to the kettle and completed the brew
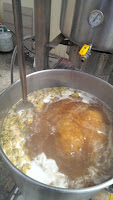
Nice Orange Boil
 using the following schedule:

Hops/Ingredients Schedule:

QuantityIngredientBoiled For
1.0 oz.NuggetEntire 90 Min. boil
2.0 lb.Maple Syrup Last 5 min of boil 
2.0 lb.Wildflower HoneyLast 5 min of boil
1.0 tbs.Pumpkin Pie SpiceFlameout

Standard and Saison
I cooled the wort and pitched the yeast into two 6.5 gallon fermentation buckets and oxygenated for 30 seconds each bucket.  I also added a vial and a half of clarityferm to each fermenter  I had 3 vials left from my last brew but and there was no real reason for me to just have one laying around.
The final aroma was awesome you could definitely smell the pumpkin and the pie spice but it was not overwhelming just a pleasant note.


INITIAL WORT GRAVITY: 1.072

UPDATE: 8/26/13 Fermentation has really taken off and it has almost completed.  It was bubbling about ever second withing 4 hours of pitching the yeast.

UPDATE: 8/31/13 Fermentation has basically stopped and I am transferring to secondary before I leave for my honeymoon.  This will give it a couple weeks to clarify since I forgot to add the whirlfloc during the boil.  The standard pumpkin ale had a gravity reading of 1.016 and the saison came in at 1.010.

Saison: 131.25*(1.072-1.010)=8.1375% ABV
Standard: 131.25*(1.072-1.016)=7.35% ABV
Good Lord these are much stronger than I was anticipating I guess adding 4 lbs of extra fermentable sugars will do that.  They still taste kind of young so I am not going to pass judgement on them.  There was a HUGE yeast cake in the bottom of both of them and its still pretty yeasty flavored.  Hopefully a couple weeks in secondary will mellow that out and refine the taste a little more.

UPDATE: 9/19/13 Got back from my honeymoon and bottled the standard pumpkin with yellow caps unfortunately I didn't have enough bottles to do the Saison so I will have to wait until later.  I took a gravity reading and added 4.0 os. of priming sugar.
Standard: 131.25*(1.072-1.014)=7.6125% ABV
The taste was not what I was expecting but hopefully it will mellow out a little the spice flavor is a little intense.

UPDATE: 9/23/13 I sanitized enough bottles this time to bottle the saison with the red caps. I took a gravity reading and then added 4.0 oz. of priming sugar to the bucket.
Saison: 131.25*(1.072-1.006) =8.6625% ABV
This has a bit of a hot alcohol flavor but overall its pretty good It may taste better carbonated.

Thursday, June 13, 2013

Beer Sensory Appreciation Class


     This Wednesday June 12, 2013 I went with a group of friends to an event hosted by Jamie Floyd, Co-Founder and Head Brewer at Ninkasi Brewing Company, and Peter Bouckaert, Head Brewer at New Belgium Brewing Company, located at the Bad Habit Room attached to Saraveza In Portland.  This originally was sold as a off flavors in beer class:

Sensory Training at Bad Habit - “Off Flavors” with Jamie Floyd, Founder & Owner of Ninkasi Brewing
Wednesday, June 12th 5:30-9:30pm
Do you think that “Diacetyl” is a dinosaur?  It is not!  It is a flavor that most beer drinkers consider undesirable.  Want to learn about this and other potential “off flavors” in your beer?  Join Jamie Floyd of Ninkasi Brewing for a sensory journey that will educate your palate like the pros!  
This just in:  Peter Bouckaert of New Belgium Brewing will be joining Jamie for the Sensory Panel and will be leading a discussion on Beer Styles as well!  Stay tuned for more details…
Temptation Incartate

     This turned out not to be a true representation of what the class actually was.  The class being taught that day was on sensory perception and how to experience the beer to its fullest. 
     The event started late and we were given strict instructions not to drink any of the beer.  So for 25-30 minutes I stared at this:
     Once the class started Jamie covered some basic brain physiology and biology explaining that your Gustation (taste) and Olfaction (smell) are located in your frontal lobe.  Your tongue can pick up 5 distinct flavors: sweet, sour, bitter, salty and umami.  You probably have a pretty good grasp on those with the exception of umami.  Umami is kind of hard to explain but its basically the savory taste that you get from some foods. Beer is not one of these foods so I am not going to go into depth on it.
     Explaining that there is a proper way to properly experience a new beer or a beer you have not had in a while there are specific steps that should be taken.

  1. Drive By Whiffing: A small whiff of the beer just as you run it under your nose, just to say "Hey, how you doin? I really like your broach."
  2. Visual Inspection: Look at the beer, recognizing its color, clarity, and head.
  3. Two Deep Smells:  Take some time to fully engulf your olfactory senses in all that is this beer.
  4. The Sip:  Take a small sip of the beer letting it fully cover your tongue and let it linger for a few seconds while you appreciate all it has to offer.
  5. Retro-Nasal:  This was a new one for me.  While either plugging your nose or ensuring that you do not breathe in take a sip of your beer swallow and then breathe out your nose.  This allows you to eliminate any other aroma that you are picking up in the air and just concentrate on that of the beer.
Jamie Floyd (Ninkasi Brewing Company)
     We were given a small glass of Total Domination IPA and then 4 small snifters with spiked samples of the Total Domination.  The glass was used so that we would have a base to compare the other samples to.  It was immediately apparent that the 4 glasses were the 4 flavors we had talked about, minus the umami. The glasses were spiked in order from left to right with sweet, salty, bitter and sour.  We did several tasting exercises that demonstrated how some flavors react with others in that they can either amplify of deaden them. Sweet and salty have an amplifying effect we had sweet-> salty -> sweet and each time the sample tasted more intense than the last time it was drank.  Bitter and sour had an similar effect.  We discovered that sweet and salty amplify everything.  Bitter amplified salt.  One functional thing that was brought out of all this taste testing was for beer tasting.  If you drink a lot of bitter beer your taste receptors become desensitized and it all becomes kind of the same.  However this can be counteracted by drinking something sour.  So at a beer fest one should drink some IPA's and then transfer to the sour beers and your experience will not be tainted by over stimulation of the flavor receptors.  He said this has something to do with hop bitterness comes from the oils in the hops and the acids in the sour beers cut through them.  I didn't pay close enough attention here so I can't really speak to it.


Peter Bouckaert (New Belgium Brewing Company)
     Next on the docket was Peter Bouckaert from New Belgium to talk about styles.  This was more of a philosophical chat about why we have styles and if we should have styles.  We were given a one of New Belgium's saisons, Saison du Poivre I believe, and asked what style of beer this was.  Then he asked us why it was a saison and a lot of philosophical questions about it.  After that we were given a Firestone Walker CDA and asked what kind of beer it was.  He spoke to the that since Firestone is in the Sierra Nevadas it should be called a SNDA instead.  It was a good conversation to have I guess philosophically but not really what I came for.  He then told us a story about a trip he took to Europe to bring back a beer to brew and how he saw some old architecture and it was very spiritual and then he translated that into Birre De Guarde.  I didn't quite follow the logical path he took from a trip where he just toured Europe and got really drunk into picking the hops, malt and yeast for his beer, but I wasn't there.  He talked about how style wasn't important only if people want to drink it.  Which to a certain extent is true, but then went on to talk about how it was necessary to let people know what to expect from it.  It was very reminiscent of conversations I have at work about what the definition of Indy Rock is or what bands constitute Butt Rock.

     After the official event was over I got to talk to the two brewers together about how perception plays a large role in how you enjoy your beer.  Also, preconceived notions of the beer will affect how you enjoy it.  For example if you know a beer is from a brewery that you like you will be more likely to like the beer just based on unconscious biases you have towards it.  Jamie said he saw a video presented by a woman at GABF from Pepsi that showed a study they did involving how big a role visual perception plays in the sensory experience of what you are consuming.

     Overall it was a good presentation even though it was not what I was expecting.  Jamie said that he will be returning to Portland soon with the actual off flavor presentation but he needs to figure out how to bring the flavor spiking lab with him on the road.  Another tidbit I got out of him is that they are going to be expanding into sour beers in the near future but they need to find a separate space for it since pedio or lacto infection could ruin one of their standard beers should they get infected.  


Saturday, May 18, 2013

Pre-Nuptu-Ale

Origins:
     I'm brewing this beer for my wedding and wanted something that all of the Bud drinking part of the family could drink and not offend their sensitive palates.  When buying this it was kind of a relief that I only had to buy one package of hops for a 10 gallon batch.  Since Whitney and I have been living in sin for over 5 years and now we are finally making it official, I decided to call our wedding beer Pre-Nuptu-Ale.

Recipe Specifications:
  • Batch Size: 10.00 gal
  • Boil Size: 12.5  gal
  • Predicted OG: 1.057 SG
  • Boil Time: 60 Minutes
Ingredients:
  • 7.70 lb Pale Malt (2 Row) US
  • 7.70 lb Pilsner Malt
  • 2.00 lb Flaked Corn
  • 2.00 lb Corn Sugar (Dextrose)
Total Grain Weight: 19.4 lb
  • 2.00 oz Cascade, US 9.5% Whole Leaf Hops 
  • WLP001 California Ale Yeast
Starter Procedure:
Friday May 17, 2013 I made my standard starter and placed it on the stir plate overnight.

Brew Procedure:
      On May 18th 2013, I decided to brew. First I calculated how much mash water I needed. total grain weight was 19.4 lbs. So to calculate mash water I used the following calculation:

19.4 lbs grain x 1.75 qt/lb = 33.95 qt. x 1/4 gallon/qt = 8.49 gal

I used 1.75 since because my hot liquor tank is too small to give the required sparge volume if I only used 1.5 or 1.33.  There isn't really a downside that I have found,  and a couple sites said  a wetter mash can increase your efficiency.  I filled the mashtun with 8.5 gallons of water and began heating it to 165 °F.  After the water reached 165 °F I added the grain and began vigorously stirring. After a few minutes the temperature had dropped down to a perfect 152 °F.  I checked the pH to be about 5.4, and placed the insulation jacket around the mashtun.
     After mashing I transferred to the kettle and completed the brew using the following schedule:

Hops/Ingredients Schedule:

QuantityIngredientBoiled For
1.0 oz.CascadeEntire 60 Min. boil
1.0 oz.Cascade Last 30 min of boil 
2 tabsWhirlflocLast 15 min of boil 
1 tsp.Yeast Nutrient Last 15 min of boil


I cooled the wort and pitched the yeast into two 6.5 gallon fermentation buckets and oxygenated for 15 seconds each bucket.  I also added a vial of clarityferm to each fermenter since this will be for my wedding, I wanted there to be something for my friend Pat to drink. I ordered a plate chiller but it hasn't got here yet so this is the last time I will have to use my immersion chiller to get my beer down to pitching temp.

Additional Comments:
    This may have been my most successful brew I have done to date.  All temperatures were hit pretty consistently and I essentially nailed my gravity reading.  Also I produced exactly 10 gallons of beer after it was in the fermenters.  Would have liked to have like 11 but not a big deal. I may dry hop with an oz. of cascade pellets I have left over from my last IPA but I'll decide when I transfer.

INITIAL WORT GRAVITY: 1.062

UPDATE 5/26/13:
Gravity at Transfer: 1.022
131.25*(1.062-1.022)=5.25%
Still needs to finish, the beer is cloudy but needs have be fined some more.

Sunday, May 5, 2013

Big Brew 2013 IPA


Origins:
My dad was coming up for the weekend from visiting my grandparents and wanted to brew some beer with his favorite son.  So I went to the brew store to gather the ingredients for our brew.  While at the store I found out that same weekend was the Big Brew at Brew Brothers.  Having no way to get my equipment down to the site I told Chris that I wouldn't be able to make it.  He very graciously offered to pick up my equipment on Friday and drive it down so that I could participate in the Big Brew.  The staff at Brew Brothers is amazing!
Big Brew 2013

Recipe Specifications:
  • Batch Size: 10.00 gal
  • Boil Size: 13.5  gal
  • Predicted OG: 1.052 SG
  • Boil Time: 60 Minutes
Ingredients:
  • 20.5 lb Pale Malt (2 Row) US
  • 1.00 lb GW Crystal Malt - 40 °L
  • 1.00 lb Briess Crystal Malt -10 °L
  • 0.5 lb Briess Cara-pils
Total Grain Weight: 36.5 lb
  • 2.0 oz. Magnum 14.9% AA
  • 4.0 oz. Simcoe 14.8% AA
  • 4.0 oz. Citra
  • WLP 001 California Ale Yeast
Starter Procedure:

Thursday March 2, 2013 I made the starter since since this was one of the first times I didn't decide I was going to brew the day I could have almost 2 full days for the starter to ferment. Typical 1000 ml starter recipe was used.

Brew Procedure:
      On May 4th 2013, we got up early and drove down to the event, there was a lot going on but Jay and Chris from brew brothers were extremely helpful in getting my equipment set up.  Since Jay had picked it up the night before and dropped it off at the store it was still in the back.

While I was setting up my equipment I saw Eric, the guy that gave me the insulation jacket for my mashtun.  We talked for a while and he gave us some awesome beer and orange infused carbonated water.

After I got settled in I first calculated how much mash water I needed. total grain weight was 22 lbs. So to calculate mash water I used the following calculation:

22.0 lbs grain x 1.5 qt/lb = 33 qt. x 1/4 gallon/qt = 8.25 gallons

I liked using the 1.5 qt/lb ratio because it makes for a looser mash and I don't have to worry about dough balls as much.  I filled the mash-tun with 8.25 gallons of water and began heating it to 165 °F.  After the water reached 165 °F I added the grain and began stirring. After stirring the mash vigorously for a few minutes the temperature had dropped down to a perfect 155 °F.  I placed the mash-tun insulation jacket around the vessel and let it sit for 45 minutes.  I measured a mash Ph of approximately 5.6 the test strips are not very high resolution so I had to guess.
     After mashing I transferred to the kettle and sparged.  I completed the brew using the following ingredient schedule:

Hops/Ingredients Schedule:

QuantityIngredientBoiled For
2.0 oz.MagnumEntire 60 Min. boil
2.0 oz.SimcoeLast 20 min of boil 
1.0 ozSimcoe Last 10 min of boil 
1 tspYeast NutrientLast 10 min of boil
2 tabsWhirl FlocLast 10 min of boil
2.0 ozCitraFlame out
2.0 ozCitraDry Hopped


About the time that I started the boil the food was ready.  Chris had made a crazy amount of home made sausages for everyone in attendance to eat they were really good.

After finishing up the boil I cooled the wort and pitched the yeast into two 6.5 gallon buckets that I had bought that day.  I switched to the buckets because they would be much easier to move from the event to my house than the glass carboys.

Additional Comments:
The Big Brew event was a really fun time and I had a great time hanging out with my Dad,  Whitney even stopped by a couple of times to say hi.  A lot of people came over to look at my brew sculpture and I had fun explaining all of its intricacies to them.

INITIAL WORT GRAVITY: 1.065

UPDATE 5/26/13:
Gravity at Kegging: 1.006
131.25*(1.065-1.006)=7.74%
Great Hop aroma can really taste the Simcoe resinous flavor on the back end and smell the Citra aromatic bouquet up front.

Friday, March 1, 2013

They Think I'm Mexican Brown Ale (Rebrew)


Origins:
Re brew of a previous Recipe I followed a the Janet's Brown Ale Recipe exactly this time instead of making my own modifications.

Recipe Specifications:
  • Batch Size: 5.00 gal
  • Boil Size: 6.5  gal
  • Predicted OG: 1.066 SG
  • Boil Time: 60 Minutes
Ingredients:
  • 12.0 lb Pale Malt (2 Row) US -2 °L
  • 1.25 lb Crystal 40 Malt - 40 °L
  • 1.25 lb Cara-Pils Dextrin Malt -2 °L
  • 0.50 lb Chocolate Malt - 350 °L
Total Grain Weight: 16.0 lb
  • 3.25 oz. Northern Brewerer [11.4%] Whole Leaf Hops
  • 3.00 oz. Cascade Pellet [6.8%] Pellet Hops
  • 2.00 oz. Centennial [10.9%] Pellet Hops
  • WLP 001California Ale Yeast
Starter Procedure:

     Friday February 22, 2012 I made my starter. The usual procedure and recipe was used to create the starter.  It was placed on a stir plat overnight.
  • 100 g DME
  • 1/4 tsp Wyeast Yeast Nutrient
  • 1 Drop Fermcap-S Foam Inhibitor
  • 1000 ml Water
Brew Procedure:
      Saturday February 23, 2012  was brew day, my friend Anthony came over to do an batch with me since neither of us had brewed in a long time. First I calculated how much mash water I needed. total grain weight was 24 lbs. So to calculate mash water I used the following calculation:

16.0 lbs grain x 1.5 qt/lb = 24 qt. x 1/4 gallon/qt = 6

I decided to use a little thinner mash to see if there was any differnce in my brew house efficiency.  I filled the mashtun with 6 gallons of water and began heating it to 165 °F.  After the water reached  what I thought was 165 °F I added the grain and began stirring. After stirring the mash vigorously for a few minutes the temperature had dropped down to 160 °F. This was hotter than I wanted but so I left the insulation jacket off and opened the lid to let some heat escape. This didnt really bring down the heat enough for me so I added some cold water to bring it down.  Unfortunately I added too much so it dropped it to like 148°F.  Hopefully this will not have wrecked my mash I guess Ill see when the beer is done.  The recipe calls for 1 oz Norther Brewer in the mash but I don't think that imparts any hop characteristic to the beer so I just threw it in the 60 minute hop addition.
     After mashing I transferred to the kettle and completed the brew using the following schedule:

Hops/Ingredients Schedule:


QuantityIngredientBoiled For
2.25 oz. Northern BrewerEntire 60 Min. boil
1.00 oz.Northern BrewerLast 15 min of boil 
1 qtyWhirlfloc TabLast 15 min of boil
1.50 oz.Cascade Last 10 min of boil
1.50 oz.Cascade Flame Out
2.00 oz.CentennialDry Hopped 

I cooled the wort and pitched the yeast into a 6.5 gallon carboy.

Additional Comments:
 My pre boil volume was low so I ended up with like 4.25 gallons which hopefully will be ok it my hurt the dry hop extraction but it should help the gravity.  Speaking of gravity...

INITIAL WORT GRAVITY: Since its been so long since I brewed I forgot to take an initial gravity reading like a moron.